Running a test deployment
With everything set up, it's now time to run a game server container on your cluster manually so that we can make sure that network connections are working.
Creating a game server with the pushed image
On the Kubernetes control node, open a text editor with nano game-server.yaml, and then define a game server in it. You can use the following file as a template, but make sure you update:
image: This should be replaced with the URL you pushed to when preparing your game server.resources: Adjust this for the resources your game server container will require.initialDelaySeconds: Adjust this for how long it takes your game server container to fully start up.
apiVersion: "agones.dev/v1"
kind: GameServer
metadata:
  generateName: "eos-dedicated-server-"
spec:
  health:
    # Adjust this for how long it takes your game server container to start serving traffic.
    initialDelaySeconds: 120
    periodSeconds: 10
    failureThreshold: 10
  ports:
  - name: game
    portPolicy: Dynamic
    containerPort: 7777
  # Example on defining beacon ports. If your game doesn't use beacons
  # you can remove this port definition.
  - name: beacon
    portPolicy: Dynamic
    containerPort: 12345
  template:
    spec:
      # Don't forget to use your GitLab pull secret.
      imagePullSecrets:
        - name: gitlab
      containers:
      - name: eos-dedicated-server
        # Update the image to the URL you pushed your packaged game server to.
        image: registry.gitlab.com/redpointgames/internal/eos-game-server:latest
        resources:
          requests:
            # Adjust these values for your game server.
            # 1GB of RAM
            memory: "1Gi"
            # 1.5 vCPU
            cpu: "1500m"
          limits:
            # These should be the same settings as requests.
            memory: "1Gi"
            cpu: "1500m"
Then:
- Press
Ctrl-Oand hit Enter to save the file. - Press
Ctrl-Xto quit the text editor.
Create the game server container by running the following command:
kubectl create -f game-server.yaml
You should then see output similar to the following:
gameserver.agones.dev/eos-dedicated-server-x9ddb created
You can check if the game server container is ready by running kubectl get gameserver:
root@west-europe-01:/home/jrhodes# kubectl get gameserver
NAME                         STATE       ADDRESS           PORT   NODE             AGE
eos-dedicated-server-x9ddb   Ready       126.118.159.102   7554   west-europe-03   91s
Make sure the game server container state changes to Ready. If the game server container is Unhealthy, Agones will try to restart it. If it's not changing to a Ready state, check that you've implemented the Agones health checks correctly and you've implemented the Agones ready call correctly.
If it's still not becoming ready, try increasing the initial period delay for health checking in the configuration above.
Testing the session is visible in the EOS backend
You can get the logs for your game server container with a command like this:
kubectl logs eos-dedicated-server-x9ddb eos-dedicated-server
In the logs, you should see the ID of the session the server created on the EOS backend; something similar to:
[2022.04.05-05.53.31:615][162]LogRedpointEOS: Verbose: CreateSession: Successfully created session 'MyLocalSessionName' with ID '40d67d8233814f0680209f0fd5649feb'
In the Epic Games Developer Portal, search for the session ID that you see in the logs under "Game Services" -> "Matchmaking".
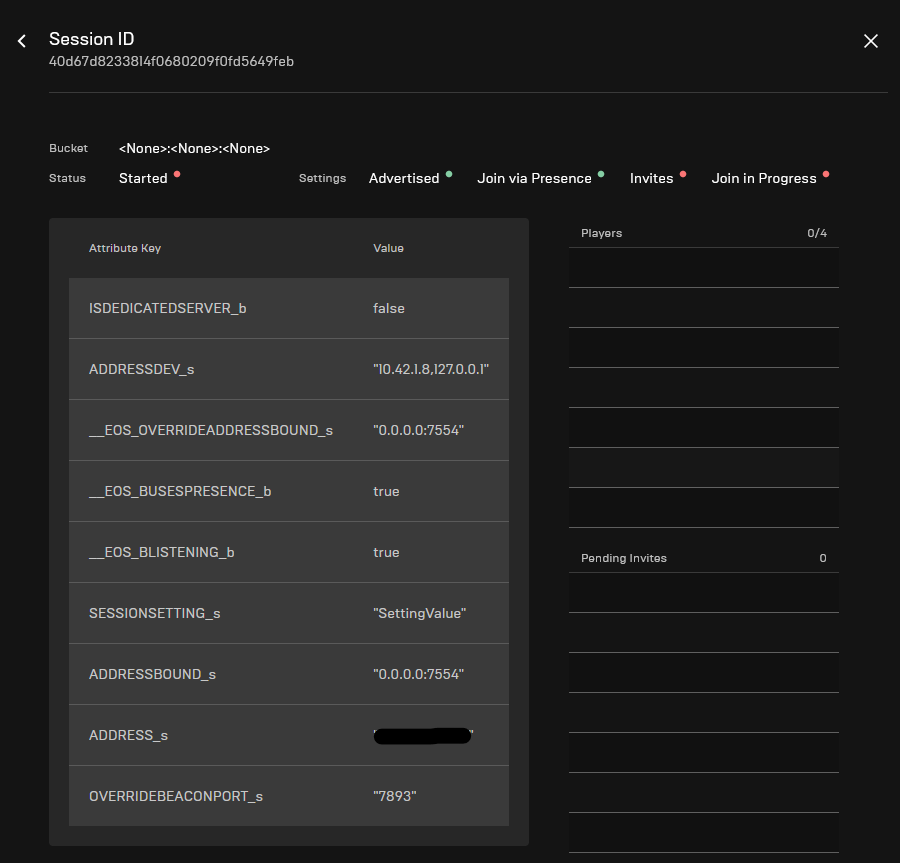
You should see the PORT value in the __EOS_OVERRIDEADDRESSBOUND_s attribute.
Testing connectivity from the client
In the editor, launch a standalone game from the Play button in the toolbar.
Make sure you can see the session that the game server container created in the sessions list from the client, and then try to join it. If everything is set up correctly, you should be able to connect to the game server container from your game client.
If you can't seem to connect via the sessions list, or you haven't implemented that functionality in your game client yet, you can alternatively connect by pressing ~ and then typing:
open <address>:<port>
Where <address> and <port> should be replaced with the values shown in kubectl get gameservers.
When your client connects to the game server container, you should be able to see the appropriate log entries with kubectl logs -f:
[2022.04.05-06.04.32:279][923]LogNet: Login request: ?Name=redpointqa0001 userId: RedpointEOS:000274d6c90e403ba35bb068391c0d38 platform: RedpointEOS
[2022.04.05-06.04.32:312][924]LogNet: Client netspeed is 100000
[2022.04.05-06.04.32:680][935]LogNet: Join request: /Game/ExampleOSS/Common/Multiplayer/MultiplayerMap?Name=redpointqa0001?SplitscreenCount=1
[2022.04.05-06.04.32:704][935]LogNet: Join succeeded: redpointqa0001
Clean up after testing
Once you've finished your testing, delete the game server container with:
kubectl delete gameserver/eos-dedicated-server-x9ddb